Hacking Messaih -1: Vulnhub Walkthrough
Hello everyone. This is Russell Murad working as a Junior Security Engineer at Enterprise Infosec Consultants (EIC).
I just solved a vulnerable machine from Vulnhub named “Hacking Messaih-1”.
You can download it from here —
Let’s begin.
I've configured both Vulnhub machine and my kali machine on the Virtualbox bridge connection.
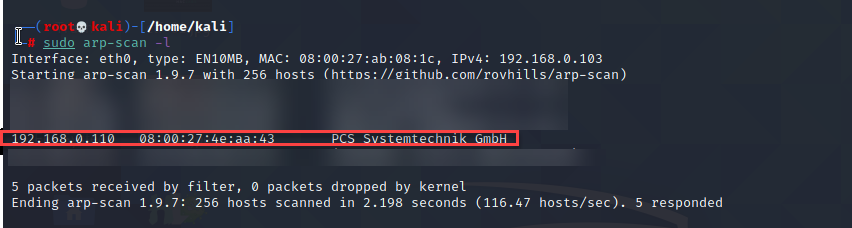
- First, we are going to check my victim machine’s IP using arp-scan.
2. Then we need to find some open ports using nmap.

3. Here we’ve got two ports open. 80 for HTTP, 22 for SSH. we’ve also found robots.txt and /icons/ path. We’ll investigate those later.
4. Now we intended to find more directories using GoBuster.

5. Now, time to check some manual stuff. Lets, start Firefox to check the website. There is nothing but that photo, a static site.

6. Let’s check the source code of this site…

There’s a hint…
It’s clear down here… Some random guy, he’s an assassin, there’s a link up with the bank of pain. We’ll keep that in mind. Hopefully, this information will useful for later.
7. We’d checked /icon directory. Nothing’s there. But when we’d checked robots.txt, there a Base64 code.

let’s convert it…

okay… There’s a password named “royalbankofspain”. We might use it for login in SSH port. But first, we need a username. Where is it?
8. At this moment. We have only one option. That is the weird-looking creepy photo of our target site. We tried to see if there are any hidden data in that photo but it didn’t work out.
So, I’m going to search on tineye.com using that photo.


9. By analyzing those search results We’ve found that the photo is taken from the TV series Money Heist (Spanish: La casa de papel). Neymar played a character there.
Anyway in the previous hint (Step:6) talks about an assassin. We’d google about it and find out that there was an assassin named “gandia” in the Money Heist.

10. Let’s try that name as a username with the password from Step-7 and login in SSH port of our target IP.

11. We’ll discover professor.tar file in the berlin directory. Because of that file have Root Privilege we couldn’t just decompress it in that folder.

12. After some time we’ll find out we can copy that into/tmp directory and then download it into our Kali Machine.


13. We’ll decompress it and find a password.

14. Now we’ll open a new terminal and login into SSH again using professor as a username.

15. Now if we try to use “sudo -l” it’ll say that the user professor can run “tmp/execute” file with root privilege.

16. now we’ll go to that /tmp directory and a file named “execute” and put bin/sh command.

17. We’ll run that program with sudo. Then if we check our id, we’ll find out our root privilege.

18. Then, as usual, we’ll import a python spawn tty shell. Go to /root and open our flag file. It’s done.

So, guys, this is it!
Thank you for reading this write-up. Cheers!